

2020-06-13 22:20:00
One Reddit user suggests that, while my suggested way of working is easier than others, it may also lead to "bricking" of servers: literally rendering them unusable, by applying firmware updates out of order.
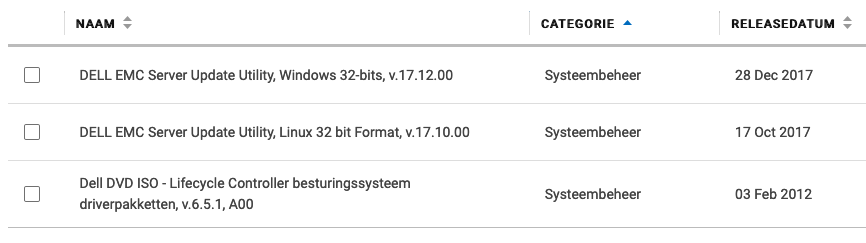
Their suggestion is to instead use the SUU (Server Update Utility) ISO image for the server in question, which may be run either from a booted Windows OS, or through the LCM (Life Cycle Manager).
More information about the SUU can be found here at Dell.
Also, if you take a look at Dell's instruction video about using the SUU ISO from the LCM, I think we can all agree that this in fact the easiest method bar none.
EDIT: If it weren't for the fact that the old LCM firmware on the R410 cannot read the SUU files. So you have to use this with Windows or CentOS.
If you want to skip all the blah-blah:
Early in 2019 I purchase a Dell R410, part of Dell's eleventh generation (11G) server line-up from 2010/2011. Since then I've had a lot of fun growing and maintaining my homelab, learning things like Ansible and staying in touch with Linux and Windows administration.
One task system administrators commonly perform, is the upgrading of firmware: the software that's built into hardware to make it work. If you check out the list of available firmware options for the R410, you'll see that quite a lot of that stuff goes into one simple server. Imagine what it's like to maintain all of that stuff for a whole rack, let alone a data center full of those things!
In the case of the R410, support options from Dell are slipping. While many homelabs (and some enterprises) still rock these now-aging servers, the vendor is slowly decreasing their active support.
In my homelab I have tackled only a small number of firmware updates and I'll quickly discuss the best/easiest way to tackle each. In some cases it took me days of trying to figure them out!
Dell's 11G systems (and later) include the Life Cycle Manager (LMC) which makes firmware updates a lot easier. You reboot your server into the USC (Unified System Configurator), launch the updater and pick the desired firmware updates.
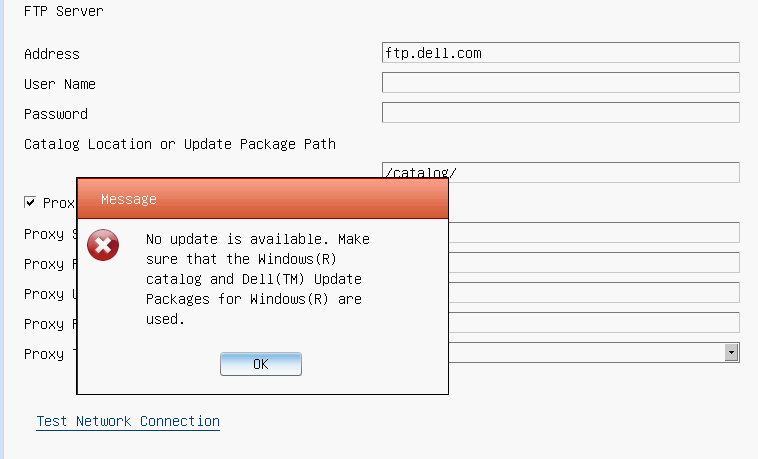
Unfortunately, the bad news is that somewhere in 2018 Dell dropped the 11G updates from their "catalogs". You can still use the following steps to make your 11G system check for updates, but it won't find any. You can check the catalogs yourself at https://ftp.dell.com/catalog/. Mind you, based on this forum thread, the Dell ftp/downloads site hasn't been without issues over the years.
"No update is available. Make sure that the Windows(R) catalog and Dell(TM) Update Packages for Windows(R) are used."
There are no more updates for 11G systems available for LCM.
Technically it's possible to make your own internal clone of Dell's software update site. For a large enterprise, that's a great idea actually! Dell's recommended way of setting up a mirror to host updates for your specific systems, is to use the Repository Manager (DRM).
You could also use DRM to create a bootable USB stick that contains the updates you want, so the system can go and update itself, using LCM. Great stuff!
But you're still going to run into the same issue we discussed in the previous paragraph: 11G updates are no longer available through the catalogued repository. You can only get them from the Dell support site, as per below.
So for 11G, forget about DRM. For anything besides the iDRAC, you will need to boot an OS to update your firmware.
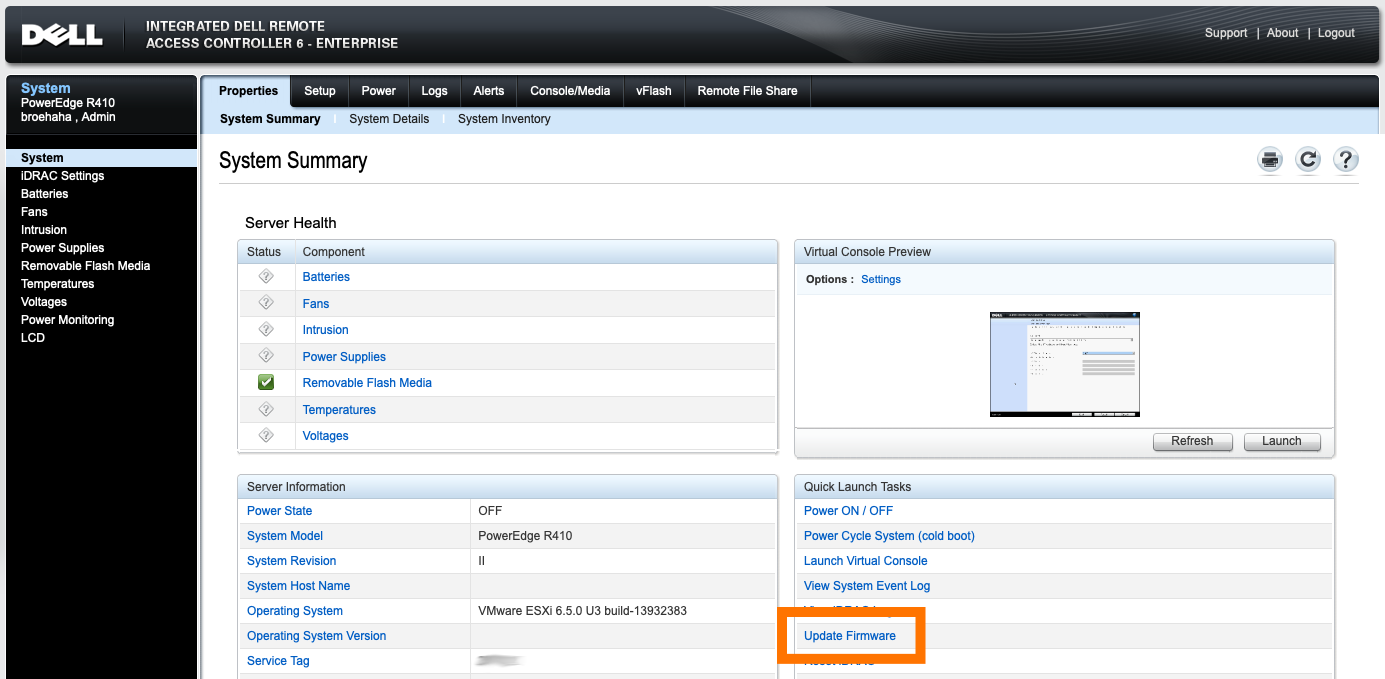
Updating the iDRAC integrated management system (if you have it) is the easiest task, assuming that you have the full Enterprise kit with the web GUI.
My R410 runs VMware ESXi which, while it's a Unix, is not supported to run Dell's firmware updates from. Dell support a plethora of Windows versions, a few other OSes and (for the 11G systems) RHEL 5 or 6 (Red Hat Enterprise Linux).
I first wanted to try CentOS 6 (a RHEL 6 derivative), because that's an OS I'm quite comfortable with. I grabbed an ISO for CentOS 6 Live, used dd to chuck it onto a USB stick and booted the OS. Running the BIOS and LCM updates worked fine.
However, the BMC update proved to be quite a mess! In the .BIN package you'll find a rat's nest of shell scripts and binaries which have dependencies not available by default on the CentOS 6 live DVD (like procmail and a bunch of older C libraries). I tried fighting my way through all the errors, manually tweaking the code, but finally decided against it. There has to be an easier way!
Thanks to a forum thread at Dell, I learned that there is in fact an easier way. Instead of fighting with these odd Linux packages, let's go back to good ol' trusted DOS!
I learned that booting FreeDOS from a USB stick on the R410 is problematic. In my case: it's a no-go. So I took FreeDOS 1.3 and burned their Live CD to a literal CD-ROM. Stuck that in the R410's DVD drive and it boots like a charm!
While FreeDOS does not have USB drivers, there is some magic in the underlying boot loaders that will mount any USB drives attached to the system during boot-time. The USB stick I put in the back USB port was made available to me as C:, while the booted CD-ROM was R:.
What do you put on that USB stick? The contents of the PER410*.exe files available from Dell's support site. Each of these is yet another self-extracting ZIP file, containing all the needed tools for the update.
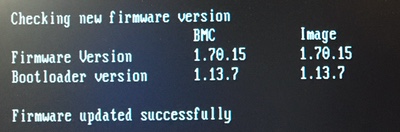
After removing the two iDRAC modules (read below) and getting the correct update (see below also), I followed the instructions from Dell's support team in that forum thread, extracted the ZIP file onto the USB stick, booted FreeDOS and ran "bmcfwud". The system needed a reboot and a second run of bmcfwud. And presto! My BMC was updated!
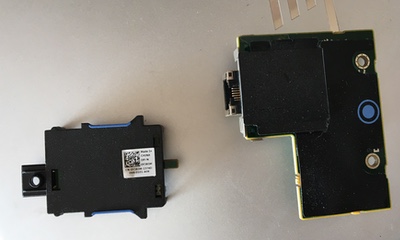
BMC stands for Baseboard Management Controller. It's Dell's integrated IPMI-based management system, which is literally integrated into the motherboard of the 11G systems. It'll let you do some basic remote management. The most important reason for homelab admins to consider updating BMC is to get version >=1.33 which greatly decreases fan noise.
BMC was superceded by iDRAC (integrated Dell Remote Access Controller), which offers cool features like SSH access, a web GUI and much, much more features! Here's a short discussion about it.
For all intents and purposes iDRAC replaces BMC. If you have an iDRAC installed, the BMC will not be active on your 11G system. The fan noise issues on the R410 should be fixed with any recent version of the iDRAC firmware.
So why did I want to update the BMC firmware?
Because I'm stubborn. =)
Initially, running the updater failed because it said my BMC was at version 2.92. Well, that's impossible!

Turns out, that's because I still had the iDRAC in there! :D I removed both iDRAC daughter cards and tried again.

A downgrade? While I grabbed the most recent BMC update from Dell's site?! No thank you !
So, funny story: Dell's support site for the R410 states that the most recent available version for BMC's firmware is 1.15. The poweredgec.com site for 11G also confirms this. But if you manually search for them, you'll find newer versions:
Apparently my BMC already had 1.54, so it already had the fan updates from 1.33. Guess all the noise that thing was making was "normal". Anyway, grabbing the 1.70 update and running bmcfwud finally had the desired end result.
kilala.nl tags: sysadmin, work,
View or add comments (curr. 0)
All content, with exception of "borrowed" blogpost images, or unless otherwise indicated, is copyright of Tess Sluijter. The character Kilala the cat-demon is copyright of Rumiko Takahashi and used here without permission.